Before you head out into the woods and wilderness to do a little hunting, it might be worthwhile to take a little time and do some shopping for a good hunting scope. By adding one of these to your hunting rifle, you give yourself a distinct advantage not only over the animals that you’re tracking but also other hunters out there. When you use one of these, your accuracy improve regardless of the conditions that you’re hunting in at the moment. Of course, there are a lot of different brands and models out there, so knowing which one offers the best value for the money while still meeting your needs can be confusing. To help you out with your comparison shopping, keep reading below as we review the top hunting scopes for people like you and me.
Shopping Guide: Finding The Best Hunting Scope For The Money
When reviewing the different scopes that you can buy, it is a good idea to compare them against each other using some common baseline criteria. This makes it easy to tell almost immediately if a scope is not going to work for you, which helps speed up the decision making and buying so you can get out in the field with your new hunting gear.
Things that you might want to consider when seeing how the various models stack up against one another include:
- magnification level
- variable, not fixed, magnification
- tube diameter
- weight of scope
- field of view
While features and specs can vary from one hunter to the next, we like to see scopes that are fog-proof, waterproof, require multi-coated lenses, and able to withstand even the most aggressive hunter.
Some of the top hunting scope brands that you will find in stores and online include:
- Nikon
- Leupold
- Bushnell
By choosing one of the brands above, you know that you’re getting a high quality hunting optics equipment that will serve you well out in the woods. But, for a bit more guidance, keep reading for our in-depth reviews below.
As you look at the available hunting rifle scopes, you will notice that retail prices range from under $200 to well over $1000. While your purchase may be restricted by your budget, it is a good idea to buy the best scope that you can afford since it is basically a really good eye for your rifle. Basically, it magnifies things in the distance (your targets and surrounding area) so that they appear larger, which helps you to aim and make an accurate kill shot the first time. And if you needed a pair of eyeglasses, you wouldn’t try to save money and get a lower quality pair just because of a cheaper price, right? So, use the same thought process when evaluating possible hunting scopes to buy yourself.
After comparing rifle scopes, we’ve picked out the products below as the best value hunting scopes for the money. There is something for every price range, so read our reviews and determine which one best meets your needs.
Best Hunting Scope Under $300
Nikon P-223 3-9×40 Mate BDC 600 Review
Outdoorsman Time rating:
Performance:  (4.8 / 5) Quality:
  (4.8 / 5) Value:
  (4.8 / 5)
Overall:  (4.8 / 5)
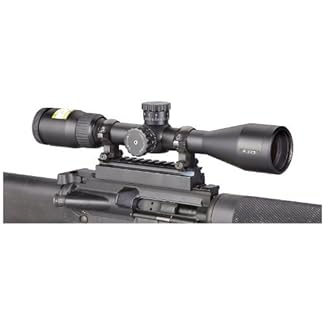 Not all hunters can afford to spend a large amount on a rifle scope, and the truth is that you do not have to. In fact, there are a lot of great scopes that come it at a price range well under $200 or $300.
However, it is important to note that you often sacrifice some features for that cheap, low price. With that in mind, the very best model for the money under $300 is the Nikon P-223 3-9×40 Mate BDC 600 rifle scope.
This modern sporting rifle scope has a lot to offer the hunter on a low budget. It is a very high quality piece of hunting optics gear that offers clear, high quality and very good accuracy. Honestly, that is some of the more important things that you expect from your rifle scope, which is why this one is such a good buy.
When you look through this one, you’ll notice that the glass is high quality. That’s not surprising though since Nikon has been making great camera lenses for decades. And the variable magnification is 3x-9x, which is pretty standard at this price point.
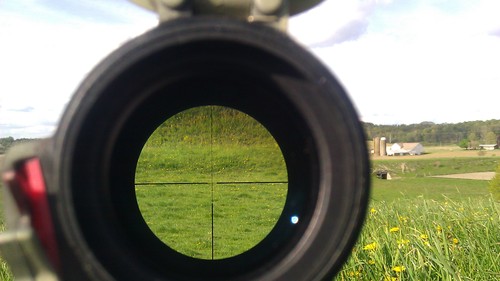
160 yds at 9x zoom
For optimal performance, you’ll want to mount this on a .223 Remington or 5.56 NATO. That’s what it is designed for, but it performs well no matter what, especially on longer range shots. With this, you get precision shooting at its finest thanks to the 1/4-MOA hand-turn tactical-style, zero-reset turrets-positive click reticle adjustments.
The generous eye relief is good even in the most extreme shooting angles and heavy recoiling cartridges. And of course, it is fog proof and waterproof. It weighs in at around 17 ounces, which is about average for most hunting scopes.
Overall, this is a great scope for an AR15 and it comes it at a great value too. You really can’t beat the price when it comes to great optics.
Best Hunting Scope Under $1,000
Leupold VX-R Patrol FireDot Illuminated Rifle Scope Review
Outdoorsman Time rating:
Performance:  (4.7 / 5) Quality:
  (5 / 5) Value:
  (4.5 / 5)
Overall:  (4.7 / 5)
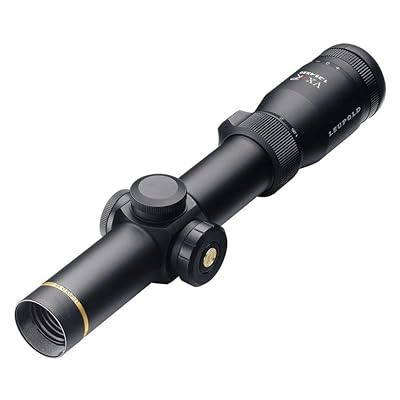 Serious hunters with a little more money to spend can do themselves a favor by choosing a higher price scope that offers better features and specs. And probably the very best hunting scope you can buy for your rifle under $1000 is the Leupold 113769 VX-R Patrol FireDot Illuminated Rifle Scope with Motion Sensor Technology.
It’s no secret that Leupold is probably the hands-down best scope maker in the business and this great piece of optics prove it. Once you put it on your rifle, you will never use another scope again!
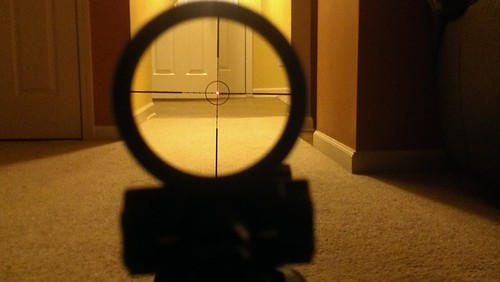
Overall, this scope performs the best when it comes to short range shooting. It has a FireDot that is very easy to see so that you can have an easier time shooting in low light situations.
It features an attractive black matte finish and DiamondCoat exterior lenses, which give you the best that money can buy at this price point when we’re talking about light transmission and abrasion resistance.
Bottom line: This is your best choice for fast moving game at 100 yards or less. It offers high quality, excellent accuracy and very clear glass.
More of Our Recommended Rifle Scope Reviews
If neither of those rifle scopes meet your needs, then I suggest that you take a look at some of the current top rated best sellers to narrow down your choices to a high quality scope for your hunting rifle.
Nikon Buckmasters II Riflescope BDC Reticle, 3-9x 40mm, Review
Outdoorsman Time rating:
Performance:  (4.7 / 5) Quality:
  (5 / 5) Value:
  (5 / 5)
Overall:  (4.9 / 5)
 It’s no secret that Nikon makes some great optics for hunters. And the Buckmaster II is definitely something to consider adding to your gear. Personally, I love everything that Nikon makes and I think you will like this one as well when you see how it performs in the field.
What I like about: the anti-reflective system is good for sunny days, water and fog proof, nice clarity, very affordable price.
What I don’t like about it: it’s not as powerful as other models on the market, but you can always upgrade to something with more power if you need to.
Bottom line: This thing has a great low price and it works really well. Plus, it is made by one of the best brands in the business.
Vortex Viper HS Rifle Scope Review
Outdoorsman Time rating:
Performance:  (5 / 5) Quality:
  (5 / 5) Value:
  (5 / 5)
Overall:  (5 / 5)
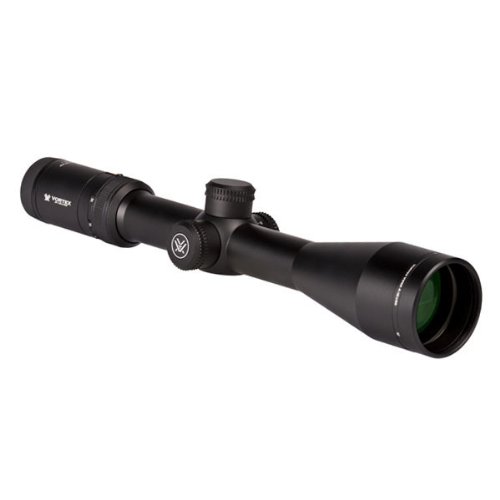 If you’re in the market for something in the mid-level price range, then this Vortex Viper model makes a great choice. There is a lot to like about this one and it performs well out in the field.
What I like about it: very high quality components, good clarity, works well in low light conditions
What I don’t like about it: for the price you pay, the reticle could be better.
Bottom line: The clarity you get is as good as with the higher priced Nikons, which makes this one a great buy at this price point.
Bushnell Banner Dusk & Dawn Circle-X Reticle Riflescope Review
Outdoorsman Time rating:
Performance:  (5 / 5) Quality:
  (5 / 5) Value:
  (5 / 5)
Overall:  (5 / 5)
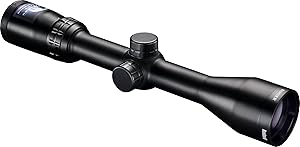 Bushnell is know for making great gear for outdoorsmen and the Banner Dusk & Dawn riflescope is just another one of their great products. I love that it is so affordable – it’s one of the cheapest riflescopes that I’ve seen on the market so far!
What I like about it: works very well in low light conditions, good clarity, cheap price, comfortable eye relief
What I don’t like about it: doesn’t come with rings but since it’s so cheap that’s not a huge deal, seems a bit shorter than my other scopes,
Bottom line: For this low of a price, I’m not sure that you can do any better. It works very well, granted you can get better performance if you spend more money, but for a hobby this one works just fine – and it’s cheap!
The Different Types of Rifle Scopes
As you compare the different scope models that are available for purchase, you might notice that there are actually different types of scopes that you can buy. This is because the type of scope that you need for your gun depends on things like:
- the type of shooting that you will be doing with it
- the type of gun that you will be doing the shooting with
- the type of features that you prefer (reticle type, finish, night vision, etc.)
When it comes to the different types, you have basically four different categories: pistol scopes, sniper rifle scopes, laser rangefinder rifle scopes, compact rifle scopes.
Pistol scopes are for hand gun users. They offer precision shots with low magnification power that enhances the shooting experience. You can find these to fit a wide variety of small pistols, whether you’re using the gun for protection or sharp shooting.
Sniper rifle scopes are great for shooting at a target that is a long distance from your position. It is basically a specialized type of telescope designed with components to fit on rifles that put a targeting reticule over the amplified image for improved accuracy. This gives you the ability to account for all the environmental variable while accurately focusing on your target from a safe distance. Basically, it lets you make a good shot without having to get close enough to be detected by the target.
Laser rangefinder rifle scopes accurately measure the span of the distance between where you sit with your rifle and where your target is located. This particular rifle scope type is popular because it doesn’t leave any confusion in the air when it comes to knowing the distance between you and the target.
Compact rifle scopes are preferred by a lot of shooters because they weight less than the other rifle scopes. So, if you are doing a lot of walking and tracking when hunting, this lightens your load a bit. As you look at some of these, you will notice that their smaller size comes in at under 9 inches, which accounts for the lower weight. However, do not be fooled by their more compact size as it does not change how efficient the scope is for giving you an accurate shot. Many owners of mini-rifles and hand guns swear by these scopes.
The Advantages of Using A Rifle Scope
You might be looking at the optics gear above and wondering to yourself – Do I really need a scope for my rifle? To help you determine if this piece of gear is really something that will be a good buy for you, let’s look at some of the reasons why buying and using a scope with your firearm is a good thing.
When you do a lot of hunting, and I hope you do, then you end up needing to get off you shots in rapid succession. And, you need to do so with some high accuracy since you are usually far away from your targets. That is where a scope comes in and saves the day thanks to it’s magnification which brings your target and its surrounding area close into view so that you can get off some quick, precise shots for the kill.
If you’re just a sport shooter, then you will enjoy the safety and precision that you get sighting your target through a scope. Again, the ability to easily zoom in on your target and point of impact is what really makes this gear shine for sport shooters.
While you hope that it never comes to pass, there is a chance that you have your gun as a means to protect yourself and your family. By mounting a scope to that firearm, you can easily locate and sight the hostile danger and accurately shoot to wound before the police show up. Using the scope also reduces the chances that you’ll miss the assailant or accidentally hit your family.
Maybe you already have an old scope that you’re no longer satisfied with. That would not be surprising since technology is constantly evolving and improving. By upgrading to a new optics gear from your old one, you can get more satisfaction and reliability from your gun. Plus, it’s just always fun to get new gear.
You do not have to spend a fortune to get a high quality scope for your rifle. For the average hunter out there, you can find plenty of great scopes between $200 and $800 that are more than satisfactory for your needs. And a good place to start is with my top picks listed up above.
How To Choose The Right Rifle Scope
If this is your first time buying a scope for your firearm, then you might be overwhelmed by all the types and prices of the gear out there. To help make your decision a little bit easier, we want to give you some tips that will help you to find the best hunting scope for your firearm and your shooting needs.
How will you be using it?
Before buying any optics gear, be honest with yourself about how you plan to use the gadget. If you just plan on doing a bit of hunting or want to be prepared to protect yourself and your family, then you probably should get one. But if you only intend to use it for a bit of target practice, then it really isn’t a necessary component.
Do you primarily plan on doing your shooting from a long distance? If so, stick with hunting and targeting scopes as that is what they are designed for.
Doing close combat shooting? If so, a tactical scope is really the only choice here because the magnification level isn’t too high, you get a nice, compact design, and your field of view is wide to reduce accuracy errors.
Not sure if a targeting or hunting scope is the better choice? Go with a targeting scope for longer range shooting.
Looking for the best AR-15 scope? Stick with something that is powered between 4x to 10x if your shooting range is within 100 yards. If you are working with 200 yard targets, then the better choice are 12x and higher hunting scopes.
Price and Brand
To get the best specs for the lowest amount of money, you may be tempted to go with a lesser known brand just based on price. The problem with this is that you will likely get diminished results compared to sticking with what you can afford from one of the well known and trusted rifle scope brands, like Leupold or Nikon. Before dropping your hard earned money on some rifle gear that is not by one of these best hunting scope brands, do yourself a favor and check out the product warranty and read some reviews by current owners to determine if it is really worth it or if you should look for another option. For some tips on choosing a great Nikon scope for your rifle, check out the video from Optics Planet below.
The Magnification Range
Scopes come in one of two different magnification types – variable or fixed. Variable is the most common as it is easier to use and has fewer moving parts.
When you see a range written out like 5-14×42, it translates as this scope’s magnification range is between 5x to 14x with an exit lens of 42mm.
When it comes to changing your magnification, it is often tricky as you do not always know which to use for your shooting scenario. For instance, deer hunters usually stick with a 3-9x scope, but can go up to 14x in open, wide plains. Hunters who go after smaller game, like prairie dogs and rabbits, need to ramp up the magnification level to around 25x in order to assure a good shot.
Eye-Relief and Light Transmission
Since guns have recoils, you want to keep your eye away from the scope to prevent any recoil-related injuries. The maximum distance that is available between your eye and the rifle scope where you still have a complete image is called the eye-relief. The higher the scope’s magnification, the lower the eye-relief number (and your chance of an injury during recoil).
When it comes to maximum light transmission, 98% is the highest that is available, but it usually comes at a premium price. You can usually find scopes that offer 95% at reasonably cheap prices though. That being said, the average that most scopes offer you is somewhere around 90%, so pay attention to this number when shopping if you want to get something higher.
Parallax
This isn’t something that you will see on every scope as it is normally only present on those that have a higher magnification power around 10 or beyond. You don’t see it on the best AR-15 scopes since they are under 10x.
With the stronger scopes, adjustments and correctors can be implemented to reduce parallax.
Field of View
With field of view (FOV), the higher the magnification level, then the smaller your field of view. Scopes generally have preset FOV ranges and you need to make sure that the ranges are a good fit for what you’re hunting. For instance, deers don’t really move around a lot unless they get startled, which means that a smaller FOV is okay. However, if you’re out hunting ducks or other fast moving game, then you need a greater FOV.
Minute of Angle (MOA) and Turret Adjustments
No matter what the effective range of your scope is, know that it is no match for variables that you cannot control like the wind. Since wind has such a strong affect on bullet trajectory, you can expect the range to be off. To compensate for this, there are turret adjustments.
With these knobs, you basically click them to make adjustments for the center of the scope and where you want the bullet to land. When you are going to be out hunting in different kinds of environments, these will be your lifesavers. It can take a little time to master them, but it is definitely something that any serious hunter will tell you is totally worth the time.
Working the turret adjustments is pretty universal from one scope to the next. For each click that you hear, a minute-of-angle (MOA) or inch is represented. It is also visible by little hash marks. Adjustment levels are typically 1/8-, 1/4-, 1/2-, or 1-inch or MOA. From a distance of around 100 yards, fire between four and five shots to see how their placement lines up. To move your impact point up, just adjust the elevation turret or UP knob. Look for the W knob to adjust the windage to better line up your impact point, it will be on either the right or left side of the scope. If the scope has a parallax knob, marked with the “infinity” symbol, you can adjust it as well. Do this by looking for movement in the reticle as you move your head up and down just slightly. If you see movement, turn this knob while looking until you notice that the movement stops.
For a visual representation of this, check out the video below by a shooter who is working with a Leupold scope.
Tips On How To Mount A Rifle Scope
Once you get your new scope, it is time to mount it on the gun. Properly mounting the optics equipment is very important, and if you have never done so before, then our tips can help you get it done correctly the first time.
If you want to know how to mount a precision rifle scope, then there is one rule of thumb that you will always want to remember when it comes to any of the conventional ring-type rifle scope mount systems and designs – when mounted, the only place that your scope should actually be touching your rifle is where the rings are and no where else. If you plan on using more than one type of gun, know that this rule holds for mounting it on any type of gun (rifle, hand gun, etc.). Scope-to-ring fit and proper alignment are what gives you optimal performance from the features and build of the rifle scope. So, if you’re having any issues with it, this is where you need to start your troubleshooting.
Check out the video below from Midway USA for a good guide on mounting a scope. Then, keep reading for more of our tips on getting a proper mount on your gun.
Don’t use the scope as an alignment or fitting tool – ever!
You may be tempted to try to use your scope to align or rotate rings, but this should never be done. Why? Because this high tech piece of optics gear for your gun has a thin aluminum build. Sure, there are a few exceptions that are made of titanium or steel, but even those are not strong enough to be abused like this.
Make no mistake, the scope tube is thin and flexible enough that you can tighten it without seeing any initial problems of slight ring misalignment. But that not noticeable flexing puts some series strain on the mechanisms in the optics tube that distorts the lenses and other components.
To avoid this, don’t align or fit with the actual scope. In fact, this is the number one cause of problems that shooters have with their scopes. So, before you get online to post a product review about how your optics gear got loose lenses, reticles that turn or break, adjustment levels that get irregular, a binding of the zoom mechanisms or related issues, think back and remember if you used the scope as a fitting or alignment tool. You probably did.
Some good tool alternatives that you see many shooters using is just a simple wooden dowel rod, or something that you already have around the house like a broomstick handle. Other shooters prefer to work with metal than wood, which means that you could just drop by a local machine shop and get them to fashion you a one-inch or 30mm diameter steel bar, unless you already have something like that lying around your garage.
Twist-In Style Tips
For the twist-in/dovetail-style front ring style that has the side-screw rear-ring mount, like you see on Leupolds, the first thing that you have to do is take the front ring and tighten it on the fitting bar where you can rotate it and get it so that it aligns with the position of the rear ring. Once you have managed to do that, you will want to then slide the rear ring onto the fitting bar. As you do, just work on nudging it to the position that is correct in terms of being relative to the base slots that are there for the rear-ring windage screws. As you do this, you need to check that the rear and forward rings are tight on the fitting rod.
Now that you have done that, you need to take the rear ring base and tighten it into place. You’ll do this with the ring at the left-to-right apparent visual center on your mount base. Once screwed into place correctly, you look for a stress-free fit by removing the top portion of the rings.
What are you looking for? You need to see if you’ve left too much stress in place by checking to see if the fitting bar does not lift easily in or out of a fully-seated position, if the bar doesn’t fully situate into a perfectly seated position when replaced, or if the bar appears to rise up a bit from the bottom of the rings if the top gets loosened up.
Got any of these issues? If so, it is time to nudge the alignment of the front ring with the bar or tweak the rear ring’s lateral angle a bit by alternating between tightening and loosening the left and right rear base ring screws. You’ll want to do this fiddling until you can determine the that stress you’ve left has been eliminated. Note that this is more easily done with a metal tool than a wooden one for precision.
When you get the system all set, you want to make sure that you do no remove the front rotating ring from the base or the fit will get a little loose because it will wear rather quick-like. And you don’t want that to happen because this is the primary recoil stress point on twist-in ring system. And a little but of slack will quickly turn into a major amount of it. A good thing to remember is that you should trash any rotating ring that you need to dismount more than a couple or three times and get yourself a replacement one instead.
For a double-dovetail system, you can use the same procedure because this type of set has rear and front rings that twist in. Don’t be surprised though if it takes a wee bit more tweaking on this type of setup.
Non-Twist In Style Tips
If you’re using gear that has a non-twist setup with something like Sako-like tapered dovetail rails, Weaver-type crosscut rings, or Ruger-type integral ring/mount devices, then you have a slightly different method to follow.
For this, you need to take your bottom rings so that they are just a bit loose on the firearm or mount base. Once you do that, just work on tightening the ring top around the bar so that it is secure. After that, you want to secure the rings to the base so that they have a snug fit. You’ll notice that there won’t be any play with the bar like the tube of scope would give, which means that you don’t have to worry about the rings having the correct alignment when tightening to the base. Basically, you have a perfect alignment once you’ve gotten rid of all the stress.
Want to make improvements on the precision fit? Just use a lapping compound to coat the ring’s inner surface. (You can buy this at most local automotive and hardware stores.) Then, you will need to put the fitting bar in the rings so that you can rotate that bar around inside the rings. As it laps around the inner part of the rings, the screws get tighter little by little. By doing this, you are increasing the bearing surface that is between the scope and the rings when you lap the bar to remove the inner ring’s surface high spots. The end result here is that you greatly enhance the scope and ring stability. This process will actually result in improvements for the scope and ring interface on pretty much any type of mount system.
Once you are all done with the lapping process, you need to take some degreaser and give the inner ring surfaces a good and thorough cleaning. You will also want to get from powered rosin from a local sporting goods store (in the baseball department) and use it to dust the surfaces of the lower ring.
Now that it is all clean, place the scope down into the bottom rings so that you can make your adjustment for the proper eye relief position, the above-gun scope clearance and the level reticle angle. With measured slow pacing, work on carefully tightening the upper rings to get them into the proper position. Do this by alternating front and rear screw turns, right side and left side.
As tightened, there are some rings that will tend to give the scope a slight pull, which results in the reticle getting off-square. You can work to prevent this from happening by making a mark with a pencil on the scope tube. Position the mark on the edge of one ring just before tightening. Then, if you notice some shifting, you can easily and quickly make the necessary corrections.
I know that this seems like a lot of information, but that is because it can take a long time to follow these instructions and do this properly the first time around. Do not be surprised if it ends up taking you an afternoon to get this done. It can be difficult to spend the necessary time that this process takes when you are excited to try out your new toy, but you do not want to do that because you will likely end up with a bad alignment and terrible fit. And you want to get the best results from your new rifle scope, so give it’s setup the time that it deserves. Otherwise, you’ll end up grumbling about scope failure that you are completely responsible for causing!
If you learn better by watching than by reading, then you might want to take a look at the video by CS Tactical below. It breaks down rifle scope mounting into eight digestible steps. You can pause or restart it at any point so that you can follow along if you have your new scope and rifle sitting in front of you right now.
As you have probably noticed, there is no perfect scope for rifles since it varies by gun, shooter and shooting needs and/or environment. One thing is certain though, there is a great rifle scope out there for everyone at an affordable price.
Before you get that new scope and put it to use, I just want to mention a few more things.
If you are using an Airsoft gun, save yourself some money and skip the scope purchase. It is not needed cause you don’t really gain anything with its addition.
Remember to be careful where you position your eye in relation to the scope. The last thing that you want is for the scope to hit your eye when the gun recoils. You’ll end up with quite the cruise and it will be embarrassing to tell your buddies that the person who beat you up was actually your rifle scope.
Also remember that your required magnification level when shopping for a scope depends on what you are hunting. Go with 3x-9x for deer hunting, 2x for your handgun, and 8x-25x or 6x-20x for long range shooting and smaller prey like prairie dogs.

